
 Introduction
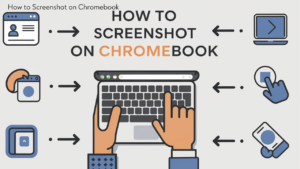
Taking a screenshot is a valuable skill for any computer user, whether you’re capturing important information, saving moments from an online meeting, or simply sharing what’s on your screen. If you’re using a Chromebook, you might be wondering how to screenshot on Chromebook effectively. Fortunately, Chromebooks offer several ways to capture your screen, and in this guide, we will explore all the methods, tips, and tricks to make the process seamless for you.
In this article, we will cover:
- Different methods to take screenshots on a Chromebook
- Step-by-step instructions for each method
- Tips for editing and managing your screenshots
- Common troubleshooting issues and solutions
- Frequently asked questions about taking screenshots on Chromebooks
Methods to Take Screenshots on a Chromebook
Using Keyboard Shortcuts
Full-Screen Screenshot
1. Press Ctrl + Show Windows Key: The Show Windows key is usually located in the top row of the keyboard and has a rectangle with two lines next to it. Pressing Ctrl + Show Windows will capture the entire screen.
Partial Screenshot
2. Press Ctrl + Shift + Show Windows Key: This combination allows you to select a specific area of the screen to capture. Once you press these keys, your cursor will change to a crosshair. Click and drag to select the area you want to screenshot.
Using the Stylus
If your Chromebook supports a stylus, you can also use it to take screenshots.
1. Open the Stylus Menu: Tap the stylus icon in the bottom-right corner of the screen.
2. Choose “Screen Capture” Option: Select either the full-screen or partial screenshot option, then use the stylus to select the area you want to capture.
Using the Screenshot Tool
Chromebooks come with a built-in screenshot tool that provides additional features.
1. Open the Screenshot Tool: Press Ctrl + Shift + Show Windows Key to open the screenshot tool.
2. Choose Your Screenshot Type: The tool will give you options to capture the entire screen, a selected area, or a specific window.
3. Capture and Edit: After capturing, you can edit the screenshot using built-in tools or apps.
Step-by-Step Instructions for Each Method
How to Take a Full-Screen Screenshot
- Locate the Show Windows Key: Find the key with a rectangle and two lines on your Chromebook keyboard.
- Press
Ctrl+Show Windows Key: This will capture your entire screen. - Find Your Screenshot: Screenshots are automatically saved in the “Downloads” folder, accessible via the Files app.
How to Take a Partial Screenshot
- Press
Ctrl+Shift+Show Windows Key: This will change your cursor to a crosshair. - Select the Area: Click and drag the cursor to select the portion of the screen you want to capture.
- Release the Mouse Button: Your screenshot will be saved in the “Downloads” folder.
How to Use the Stylus for Screenshots
- Tap the Stylus Icon: Located in the bottom-right corner of the screen.
- Select the Screenshot Tool: Choose between full-screen or partial screenshot options.
- Capture the Screen: Follow the on-screen instructions to take the screenshot.
How to Use the Screenshot Tool
- Open the Tool: Press
Ctrl+Shift+Show Windows Key. - Choose Screenshot Type: Select from full-screen, partial, or window capture.
- Edit Your Screenshot: Use the built-in tools for basic editing or open the screenshot in an image editor for more advanced options.
Tips for Editing and Managing Your Screenshots
Basic Editing
- Crop and Resize: Use image editors like Google Photos or Pixlr to crop or resize your screenshots.
- Annotate: Add text, arrows, or shapes using editing tools to highlight important information.
Organizing Your Screenshots
- Create Folders: Organize your screenshots into folders within the “Downloads” directory.
- Use Cloud Storage: Consider uploading your screenshots to Google Drive or other cloud storage services for easy access and sharing.
Troubleshooting Common Issues
Screenshot Not Saving
- Check Storage: Ensure you have enough storage space on your Chromebook.
- Restart Your Chromebook: Sometimes a simple restart can resolve saving issues.
Screenshot Tool Not Opening
- Update Your Chromebook: Make sure your Chromebook is running the latest version of Chrome OS.
- Reset Settings: Try resetting the screenshot tool settings to default.
Frequently Asked Questions About How to screenshot on chromebook
- How do I take a screenshot on a Chromebook without a keyboard?
If you’re wondering how to screenshot on a Chromebook without a physical keyboard, you can use the on-screen keyboard to press Ctrl + Show Windows Key. Another way to screenshot on a Chromebook without a keyboard is by using a stylus, if your Chromebook supports it. Both methods provide simple ways to take a screenshot on your device.
- Can I take a screenshot of a specific window on a Chromebook?
Yes, if you want to knowhow to screenshot on chromebook for a specific window, you can use the built-in screenshot tool or keyboard shortcuts. You can capture the entire screen or just a selected area. However, capturing a specific window might require manually selecting it or using third-party apps.
- Where can I find my screenshots on a Chromebook?
After learning how to screenshot on chromebook, you might ask where your captured images are saved. All screenshots taken on a Chromebook are automatically saved in the “Downloads” folder. You can access this folder through the Files app on your Chromebook to find your screenshots.
- Can I edit my screenshots on a Chromebook?
Once you’ve mastered how to screenshot on chromebook, the next step is editing your screenshots. Chromebooks offer built-in editing tools that allow you to crop, annotate, or enhance your screenshots. Additionally, you can use third-party apps like Google Photos or Pixlr for more advanced edits.
- Why is my screenshot tool not working on my Chromebook?
If you’re trying to figure outhow to screenshot on chromebook but the screenshot tool isn’t working, ensure your Chromebook is updated to the latest version of Chrome OS. Sometimes storage issues or outdated settings can cause the screenshot tool to malfunction.
Conclusion
Knowing how to screenshot on chromebook can be incredibly useful for capturing information, sharing content, or keeping records. Whether you use keyboard shortcuts, a stylus, or the built-in screenshot tool, each method provides a straightforward way to capture your screen. By following the methods and tips outlined in this guide, you’ll be able to take, edit, and manage your screenshots with ease. If you encounter any issues, refer to the troubleshooting section to resolve them quickly. Happy screenshotting!